Ironman Hawaii – Course review
It’s that time of the year! ironguides head coach Vinnie Santana shares great training and racing tips for the Ironman World Championships in Kailua-Kona.
With Ironman Hawaii just around the corner, athletes are now onto their final and specific training block leading into the race. This article is an overview of the training strategy and key workouts we use to coach our athletes taking part in the race.
SWIM
The conditions in Hawaii are known for being tough. Kona finish times are slower than most other races on the Ironman circuit—this is a result of the three disciplines and not only the hot weather, winds or humidity of the island.
We have discussed before that the swim is often an underrated component of ironman training and racing since, when it comes down to numbers, there gains to be made in the water are small. However, let’s not forget that triathlon is swimbikerun and NOT swim+bike+run—how much you train and how you race will have an impact on the back end of your run split.
The swim leg in Hawaii is usually 3 to 4 minutes slower than most qualifying races, mostly due to the fact that Hawaii is a non-wetsuit swim. This makes training a bit trickier because when we are coaching our athletes to wetsuit swims, we get them to use the pull gear (pull buoy and paddles) for most, sometimes all, of their swim workouts. The pull buoy helps with flotation while the handle paddles keep the heart rate low while building specific arm strength.
From all our athletes who qualified, only two did so in non-wetsuit swims. All the others had their training plans designed tailored to those qualifiers where they were allowed to swim in their wetsuit. So once the Kona slot was secured, we had to do some specific work in the water, as there is a significant difference between the strengthand technique needed for a non-wetsuit swim such as in Hawaii.
The main reason is that the pull buoy (or the wetsuit) helps with balance, which means the athlete stays on the top of the water without too much work. So to counter the excessive use of the pull buoy, we designed a workout with the goal of improving strength and balance. This was needed because when training with the pull buoy, most athletes tend to look up but their position in the water is still high and there is little need for a kick. But once you have no pull buoy or wetsuit, and you are still looking up or ahead, the legs will likely sink, creating extra drag and slowing you down.
Another tool we use in training for non-wetsuit swim races is the ankle rubber band; these tie the ankles together and create extra drag while preventing any kicking. This will force the athlete to rely on balance to get their legs high again—this happens once you push your chest and head down deep in the water. The athlete then gets used to this position so that when he is swimming without ankle band the position will be the same—very high in the water which is the ultimate goal of the process. A word of caution about using the ankle band—athletes without a swimming background or decent balance in the water won’t be able to swim with good technique, especially for long distances, so they should keep the repeats short, i.e. 25 to 50m.
Here is a standard set we use with our athletes:
** Choice warm up
** Main set (2km):
20x25m moderate with ankle bands – 15sec rest
20x50m as 3×50 easy, 1×50 fast – 15sec rest
20x25m moderate with ankle bands – 15sec rest
**Focus on:
• Head deep down in the water
• Water running through the back of your neck
• Imagine you are swimming “downhill”
• Push your chest into the water to bring your legs up
The above tips can also be applied if you are training for any other non-wetsuit triathlons. And the more experienced you are, the longer you can make your repeats and you may also add paddles. Some athletes even like to do fast strides with ankle bands before races—once the race starts, they feel good, confident and “on the top of the water”.
BIKE
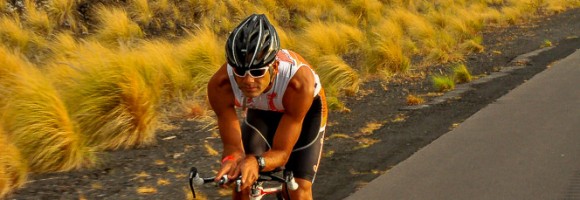
The first kilometres are still within Kailua-Kona and are a little technical and generally slow with some turns, climbs and descents. Another very important detail to keep in mind in this early stage of the bike is that the heart rate is very high since the capillaries in the arms are open, while those in the legs are closed, so the heart is forced to work hard to pump to legs. Start VERY EASY in those first 15 to 20 minutes to let the capillaries in your arms shut down and those in the legs open up. Also, don’t eat and drink until after those first 15-20min to avoid diverting blood to your stomach earlier.
Once out on the Queen Q it is time to execute your pacing and nutrition strategy. Most athletes are only racing themselves so ignore what other people are doing around you and focus on your own race. It is too easy to get into the hype of racing in Hawaii—relax and follow your plan.
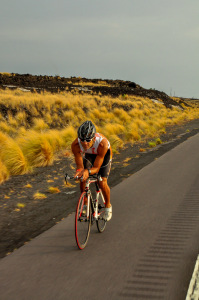
The bike course consists mostly of rolling hills, nothing too steep or too long. Some athletes prefer to ride out of the saddle for the first half of the race since at that stage there is usually a tailwind. Riding in that position gives you great power while also stretching your back and giving your time-trial muscles a bit of a break.
The only serious climb of the course is located heading to the U-turn in Havi. It is relatively long, although not steep. At this stage you also may want to ingest some calories, since the special needs is just after the U-turn, before a fast downhill with crosswinds, so there will be little opportunity to take your hands off the bars for a while. Some athletes have also reported that the bike aid station is unreliable, so make sure you don’t rely on it for your nutrition strategy.
Once headed back to Transition 2, you will likely face a strong headwind, so make sure you are mentally and physically prepared for that otherwise those last kilometres can be a struggle.
Below some specific sessions for the bike course or races with similar profiles:
Session 1) Long ride, preferably over rolling hills with climb sets
**Do 2 climbs of 20-30min long, at hard effort and half way point of your ride as:
• 1st at race cadence
• 2nd using a bigger gear and lower cadence
** Last hour should be done at moderate to hard effort pushing a lower cadence (~50rpm)
Session 2) Long ride at flat course (if no access to hills)
**Halfway into the ride, do set as below to simulate heart rate and cadence changes of the bike course:
• i.e.: 1 hour as (5min moderate/5min hard/5min easy)
** Then Time trial set on last hour:
• i.e.: 3x(10-15min ON/ 5min recovery)
RUN
The first quarter of the run goes around Ali’i Drive where there are supporters all the time who will cheer for every athlete that runs past. This can actually be dangerous because when you add the adrenalin on the top of the cheering, it is very easy to run faster than the pace you were supposed to run at.
Once out of town, athletes are faced with the Palani road climb, the steepest and longest climb on the run, and again, supporters go mad having fun watching the athletes push their way through the hill. Again, stay focused and stick to the original plan; otherwise it may take a bit too long to recover from that effort.
Then at Queen Q road, it is rolling hills for most of the time, and this is important when it comes to specific training sessions, since it is important to learn how to push on the hills and then recover quickly from that. The workouts below were designed for that part of the race
Another key part of the race is the famous Energy Lab which carries a reputation for being the hardest part of the run course. However, as we know, marketing people like to make things appear different than they are—there is a slight downhill once you enter the Energy Lab all the way to the special needs. There are aid stations, too. As for the conditions, it is usually windy.
Because the aid stations on the run course are very well organized and not too far from each other, most people opt for not carrying any gels and rely on what’s provided on the course for their calories. I would recommend taking your own, since you never know how your stomach will react to new flavors or types of nutrition under stressful circumstances and tough conditions like those in Hawaii.
Out of the Energy Lab and back onto the Queen Q, again over the rolling hills when you reach Palani downhill, famous as the attack point of Macca on Raelert for the Ironman win in 2010. Don’t get too excited heading down the hill, especially as you may be able to hear the buzz of the finish line area, because you will be directed to a left turn and will still have about a mile to go until the finish line.
Enjoy the last 400m again at Ali’i Drive as your race is over and, mission accomplished, you are an ironman!
Ironman Hawaii Run Sets
Session 1) Long Run
Include:
1 hour easy to moderate pushing up the hills then holding a moderate effort at the top of the hill (increase the stride rate)
1h moderate pushing on the downhills (fast stride with no extra aerobic load)
Session’s goal:
1st hour: Learn how to relax and recover from running up a hill while still running at your race pace. It’s important to push both the hill and the flat section that follows. Use the downhills to rest.
2nd hour: Leg-speed drill—learn how to run with a fast stride rate on fatigued legs. Keep the effort easy to moderate on flats and uphill but push down the hills. This is great to train your strength, coordination, and muscle fibre recruitment.
Session 2) Hill Repeats
Similar to session 1, however much shorter, learn to recover after pushing up the hills (Palani Road, Energy Lab, Queen Q, etc).
**Find a hill that is roughly 2min long with a flat section of another 2min. Push up the hill, hold a moderate effort on the flat, make a U-turn, run back holding that effort, then jog easy down the hill to recover, i.e.:
[2min uphill – hard
4min flat – moderate
2min downhill – easy recovery]
x8
Enjoy your training!
Vinnie Santana
ironguides is the leading Lifestyle Facilitation company for athletes of all abilities. We provide coaching and training services, plans and programs, as well training education, health and fitness products to help you learn and live a healthy lifestyle. Come get fit with one of our monthly training subscriptions, event-specific training plans, coaching services, or a triathlon training camp in an exotic location! ironguides also provides Corporate Health services including Corporate Triathlons, Healthy Living retreats and speaking engagements. At ironguides, your best is our business!
Train with ironguides!
Personalized Online Coaching: Starting at USD190/month
Monthly Training plans (for all levels, or focused on one discipline): Only USD39/months
Event based training plans:
Sprint Distance (USD45 for 8-week plan)
Olympic Distance (USD65 for 12 week plan)
Half Ironman (R$95 for 16-week plan)
Ironman (USD145 for 20-week plan)
X-Terra (USD65 for 12-week plan)
Running Plans (10k, 21k and 42k – starting at USD40)


Recent Comments