Image Post

Recovery 101

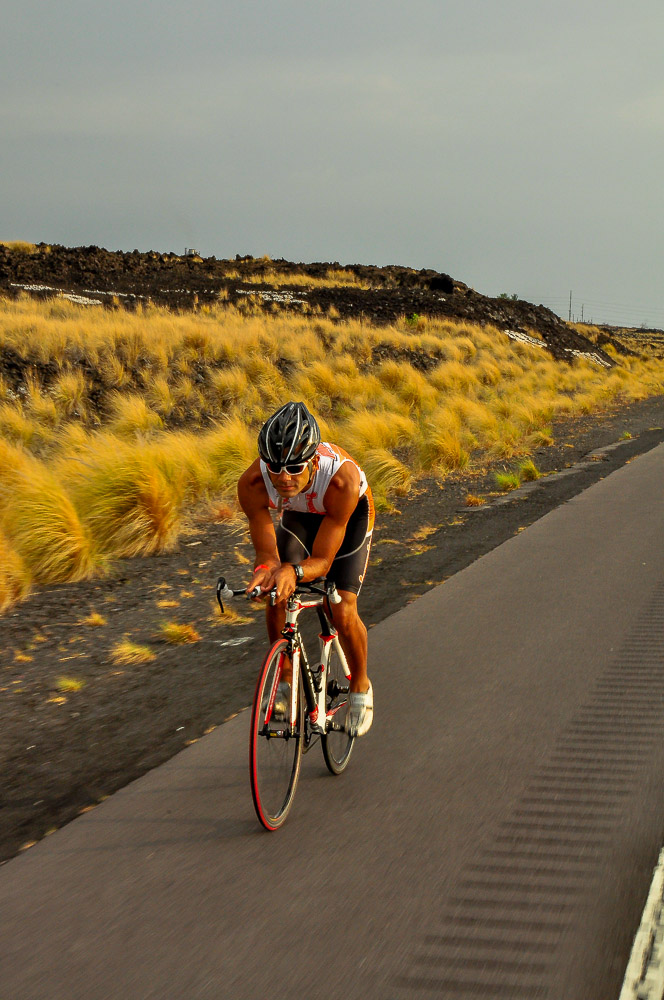
This article is for the newer triathlete who has got bitten by the bug and is starting to train every day. As your training volume increases to 8 – 10 hours or more a week, and you are getting familiar with mixing up your perceived effort levels, the issue of recovery becomes important.

Flushing the legs

A relatively hard bike or run session; for example speed-work at the track/ power intervals on the bike trainer/ tempo runs or long bike and run sessions, produces metabolic waste, that, if not cleared from the legs, will sit around and impede the body’s natural process of recovery and adaptation.

The principal behind “flushing the legs” is to move the deoxygenated, low nutrient, ‘stale’, blood back up through the venous system for filtration through the liver, where the waste products are removed, and through the lungs, to re-oxygenate the blood. ‘Fresh’ blood, full of oxygen and nutrients is returned to the legs, thereby setting up a good physiological environment for the muscular rest and repair.

The following practices are good ways to do this –

  • Propping your legs up against the wall, preferably with your feet at a level above your heart. Just lie back and let gravity pull the stale blood out of your legs. This technique works best if you leave them up for at least 20 minutes. Simple, effective and free.
  • An ice bath is a great way to refresh the legs after a particularly long and/ or hard session. The cold water causes the blood vessels to constrict, squeezing the blood out of the limbs back up through the venous system.
  • A good massage also has the same effect of flushing the legs. This can be as simple as a quick 5 min rub down in the shower post training or a 20 min session on the foam roller. The gold standard is of course an hour sports massage because on top of flushing the legs, a good massage therapist will also knead out all the tight knots and realign your muscles.
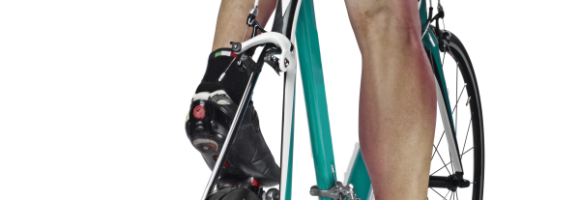
  • If all else fails and you do not have the luxury of time then squeeze into a pair of tight, full leg compression garments and get on with your day!

Eating for Recovery

Most of you will know that 40 – 60 mins post training is the best time to top up the gas tank of your triathlete bodies. During this window, they are like a sponge that will soak up whatever you put into them. Pushing out a solid training session is not a good reason to stuff your face with your favourite decadent unhealthy treats – Save that for a weekend treat.

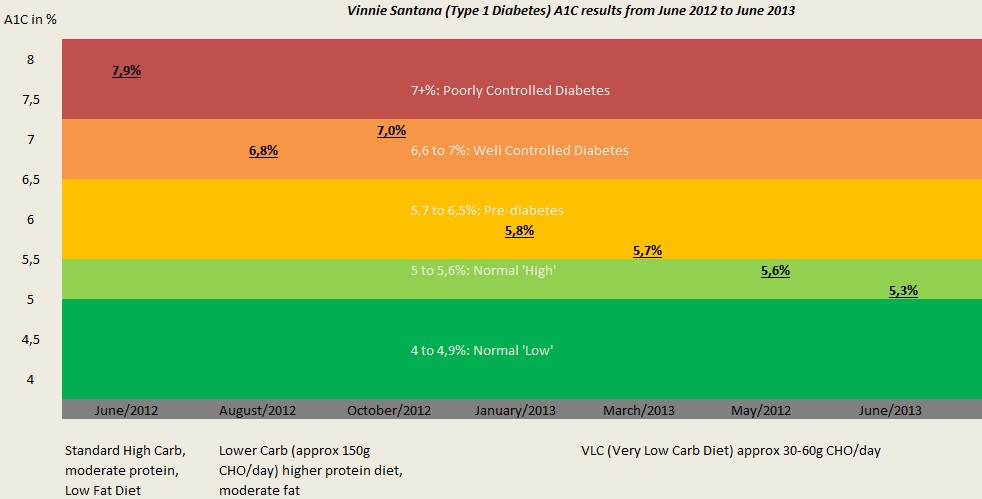
Your body is literally going to repair itself with whatever you put into it at this time.So if you want to keep putting out quality training sessions you owe it to your body to put in all the right stuff. A clean and well- balanced meal of quality, fresh ingredients that are easily digested and absorbed is the way to go.

Carbohydrates are not the enemy. In fact they are an essential part of the recovery meal.  Carbohydrates are the raw ingredient for your body to produce and store glycogen which is the main source of fuel used, and used up in, endurance training.  The important thing with carbohydrate intake is to time it right. For the purpose of recovery, get it in right after training. A light carbohydrate snack is also useful to fuel up before a session and carbohydrate sports drinks are useful to get you through the long endurance sessions. *A poor time to have a large portion of carbs is a few hours after your training and/ or late at night before going to bed.

Make sure your post training meal also contains:

  • A moderate amount of protein- The cleaner the preparation the better.
  • Loads of colourful vegetables to replenish vitamins, antioxidants and trace minerals.

If a suitable recovery meal is not available then a recovery drink which includes both carbs and protein is a useful and easy fix. You can use any one of widely available endurance formula recovery drinks or simply get in a decent sized cup of Chocolate Milk in.

Many athletes learn about the importance of adequate recovery the hard way- after getting injured or following a bout of feeling flat and over-trained. While it may not always be practical to factor all of the above into your busy multisport lives, all of the time, putting these principles into practice whenever you can will increase the quality of your training sessions and your ability to handle that extra little bit of training.

Enjoy your training,
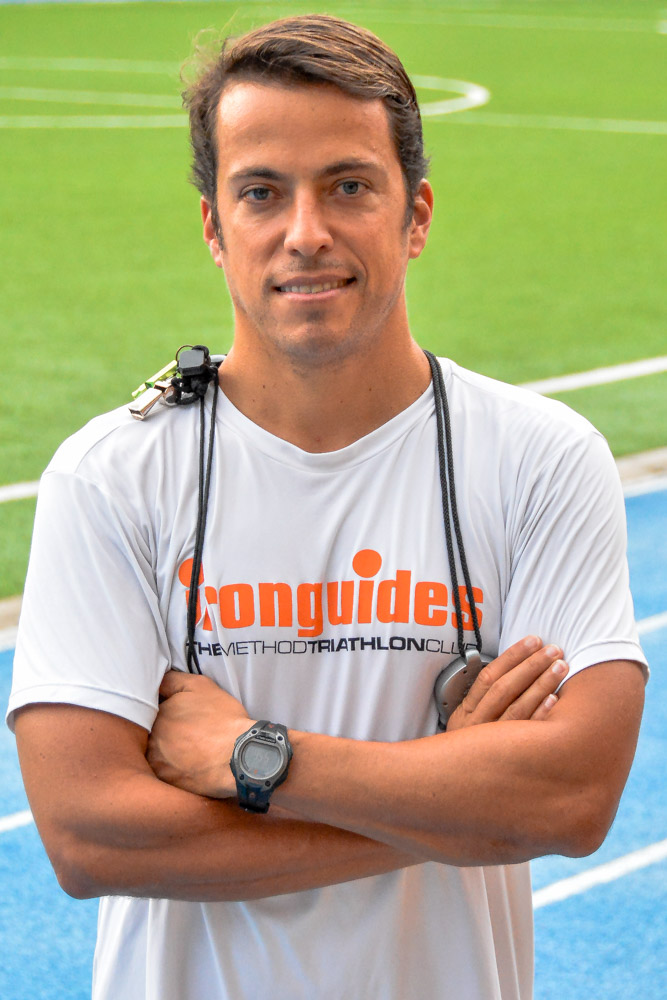
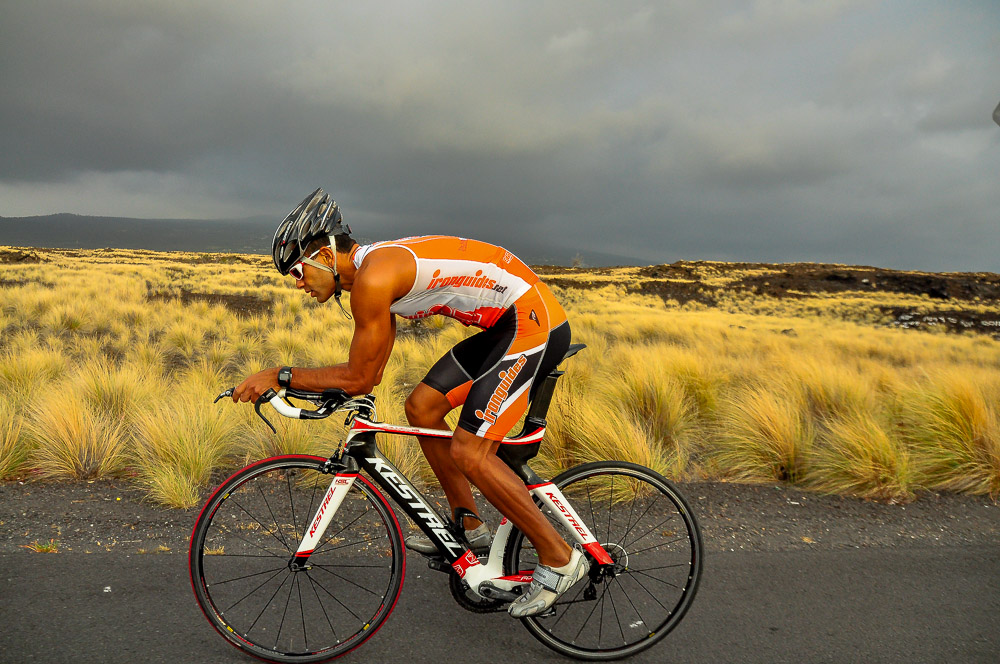
Shem Leong

ironguides is the leading Lifestyle Facilitation company for athletes of all abilities. We provide coaching and training services, plans and programs, as well training education, health and fitness products to help you learn and live a healthy lifestyle. Come get fit with one of our monthly training subscriptions, event-specific training plans, coaching services, or a triathlon training camp in an exotic location! ironguides also provides Corporate Health services including Corporate Triathlons, Healthy Living retreats and speaking engagements. At ironguides, your best is our business!

Train with ironguides!

Personalized Online Coaching:  Starting at USD190/month

Monthly Training plans (for all levels, or focused on one discipline): Only USD39/months

Event based training plans:

Sprint Distance (USD45 for 8-week plan)

Olympic Distance (USD65 for 12 week plan)

Half Ironman (R$95 for 16-week plan)

Ironman (USD145 for 20-week plan)

X-Terra (USD65 for 12-week plan)

Running Plans (10k, 21k and 42k – starting at USD40)


Image Post

Complete Guide: Improve your cycling for short and long races with indoor training

In this article, we will explore the possibilities and benefits of indoor cycling training, which is a reality for many because of the convenience, security and lack of easily accessible locations in major cities for cycling workouts.

Possibilities for indoor training and their characteristics

Spinning: I had the opportunity to ride with the inventor of Spinning, Johnny G. He was a professional cyclist who was looking for a way to practice indoors and not satisfied with the traditional stationary bike or roller training. Later he created his own indoor bike which was bought by Schwinn.

The spinning bike has the benefit of a smooth ride since it works through a fixed pinion. That is, as you accelerate and make more power, the bicycle resistance that accompanies acceleration and simulating what happens on the street. The athlete then has the option of putting more load increasing pressure on the bicycle resistance.
The benefits of spinning is a possible bike setting in a very similar to its real bike geometry, and offers SPD pedals that allow the use of clipless pedals causing the pedal stroke to be almost identical to the street.

Exercise: The traditional stationary bike carries a bad reputation among triathletes compared to other options, but it offers some unique benefits over others. The main thing is the possibility of reaching a very low pace because of high strength which is only possible in the most modern ergonomic combining a magnetic resistance and electronics. This enables an extremely low cadence even if the athlete is doing a sprint at maximum effort, which is one of our favorite workouts and mentioned at the end of the article.

Various turbochargers do not allow such resistance, and some spinning wheels, because they are mechanical, make pedaling become more “square”. So in practice we call ‘big gear’ or heavy gear, an excellent choice in exercise. Another advantage is also greater availability compared to the spinning bike, especially in hotel gyms. Now you no longer have a valid reason to stay without pedaling on your next business trip.

Turbo: The greatest benefit of the turbo is using your own bike for workouts. It is basically resistance on the rear wheel only, transforming your own bike for exercise. You will ride in a position identical to training on the street and competition, in the convenience of your home. Some brands also allow you to connect the turbo to a laptop or TV, and access the data from your workout. You can even sync the turbo to certain simulated paths on the laptop screen such as cycling the Hawaii Ironman route. The turbo increases the resistance on the route climbs and at the same time releases on the downhill.

Roller: Allows the athlete to have a ride that is almost real. Can be compared to a treadmill, because both wheels are in motion and a unique feature compared to the other three possibilities to practice indoors, it is that it requires the athlete to balance on the bike in a range of 25 to 50 centimeters. This causes the concentration to be high, and also increases the possibility of an accident. Another specific negative for the roller is that it does not offer the possibility of increased resistance.

Personally, I do not choose the roller for quality training because it makes it difficult to frame reps and for intervals since at the end of each repetition, in extreme situation of fatigue, you need to focus on stopping the bike without falling.

Benefits of indoor cycling

Endurance

Unlike on the street, an indoor workout is completely uninterrupted; you do not stop pedaling for a moment unless it is part of training. You have no traffic lights, downhill, pedestrian crossing, stops for water. Training yields more and this makes it extremely challenging. It’s a great way to simulate completely flat courses and develop your endurance.

Intensity

Because it is a workout that requires little technical skill and is not too hard (except the roller), workouts indoors allow you to achieve a sense of effort and intensity that is not like on the street because you can literally close your eyes and focus on your maximum effort, without worrying about what’s ahead.

Safety and convenience

The biggest plus of training indoors is the possibility of training within your own home or in a gym that is close to your work or convenient for you. Few athletes have the option of a safe place that is close to home for training during the week, so the indoor training allows you to have quality in a short time. In addition, it also provides you security in every way, away from cars, burglary, rain and even holes in the same street or other objects (or small animals!) That can cause falls and accidents.

If security is at the top of your priority list, consider making virtually all your workouts indoors and just do some drills, more keys on the street in the last training block before your main event.

Negative points of indoor cycling

Safety and convenience are the main benefits of indoor training, but there are also some negative points you need to consider in your training program:

Little use of stabilizing muscles

Hundreds of small stabilizing muscles (referred to as core muscles) are recruited when you pedal on the street. Making a sharp turn, pedaling standing, with side wind, all shift the focus from stabilization of your trunk. When you train indoor you do not have that need or reflection of using the stabilizer muscles.

This can result in problems on race day, because being small muscles, these tend to fatigue faster. On race day it may feel difficult to keep in a more aggressive position in the clip due to pain in the shoulders, neck or back, or just feel a general fatigue.

Less wind resistance

The indoor training allows you to train at very high intensity due to security, you can literally close your eyes and focus on the effort and intensity of each shot. It is almost impossible to find a place in the street or road that will offer you that opportunity.

As much as your legs and lungs “burn”, wind resistance and the street are not part of the equation, making the ride a little different. Overall, indoor cadence becomes a bit higher than on the street, also causing problems on race day.

Hills

The indoor training can be adjusted to simulate uphill, just use a lower cadence and a greater intensity. Some athletes also like to raise the front of the bike (only possible in the turbo) to simulate some changes, especially in perception when dealing with climbs. But nothing will bring you the same benefits as the real climbs.

On the other hand, the indoor training will develop your endurance very well because you just cannot stop pedaling. Expect your performance on flat courses to increase, while on courses with ascents you encounter difficulties.

Technical skills

Ride on the street, becoming a more technical rider, not necessarily a stronger rider, increasing ability on the bike as well as increasing ability to behave in situations of training and races. The more skillful you are, riding in a race will be less stressful, just as you possibly gain time on technical descents compared to the rider that makes the most of training indoors.

Much of the above problems can be solved with a weekly pedal on the street or road, preferably on an undulating course or mountain climbing. As much as you like to train indoor, make an effort and go weekly to the street.

Best practice to be done indoors

Strength Training:

20min easy warm up

10 to 20x POWER interval [1min with 45-55 rpm HEAVY RESISTANCE / with 1min VERY EASY recovery]

Drop at will:

Notes: Make every effort MAXIMUM, very heavy resistance! The cadence should be low (40-45 rpm per leg per minute), you will not go faster, because the resistance is too high! We will leave your legs “rubbery”!

Aerobic conditioning training (VO2):
15min progressive heating
Series:
1x (4min maximum / 4min loose spinning)
2x (3 min max / 3min loose spinning)
3x (2min maximum / 2min loose spinning)
4x (maximum 1min / 1min loose spinning)

– At a higher cadence which proves short (~ 90)

Treat every rep as if it were the only and last of the day, do not hold for the following reps, eg make the first 4 minutes as if the training was over then. It’s OK if your power falls towards the end of the workout.

Endurance training – double or challenge

And if it is raining on a long training day and for safety reasons you choose to train at home or at the gym? You have 2 options:

If something casual and motivation is high, do this workout as a personal challenge, and cycle up to 2/3 of the planned time (eg 2 hours in the original training are 3)
Distribute the training in two sessions, one in the morning the other in the evening, two drills at 1 hour duration will result in a greater intensity and greater motivation than 1 training for 2 hours.
Enjoy your training!

By Vinnie Santana, coach, ironguides.net, Bangkok
vinnie2

ironguides is the leading Lifestyle Facilitation company for athletes of all abilities. We provide coaching and training services, plans and programs, as well training education, health and fitness products to help you learn and live a healthy lifestyle. Come get fit with one of our monthly training subscriptions, event-specific training plans, coaching services, or a triathlon training camp in an exotic location! ironguides also provides Corporate Health services including Corporate Triathlons, Healthy Living retreats and speaking engagements. Atironguides, your best is our business!

More info at www.ironguides.net


– 

Train with ironguides!

Download our free e-Book “Triathlon Secrets” – Training methods of olympic medalist, ironman and world champions revealed

Personalized Online Coaching:  Starting at USD190/month

Monthly Training plans (for all levels, or focused on one discipline): Only USD39/months

Event based training plans:

Sprint Distance (USD45 for 8-week plan)

Olympic Distance (USD65 for 12 week plan)

Half Ironman (R$95 for 16-week plan)

Ironman (USD145 for 20-week plan)

X-Terra (USD65 for 12-week plan)

Running Plans (10k, 21k and 42k – starting at USD40)

Image Post

1 Key to a Better Ironman Run

The big news out of the 2017 Kona Ironman World Championship was how new male elite champion Patrick Lange of Germany ran through the field and win the title in a record breaking time of 8:01:40.  Lange came out of T2 10 minutes and 23 seconds off the lead and at 11th place.  When Lange was done, his race-best 2:39:59 marathon split gave him his first Kona title.

For the age grouper, whatever the goal is, gunning for a podium spot, hoping to break a personal record, or simply dreaming for a decent run split, the marathon after a 180km bike is where those dreams live or perish. Here is one key to a better ironman run:

GET STRONG ON THE BIKE

You can log all the miles you want on running to improve that marathon split, but you will never put on a decent time if you don’t get your miles done on the saddle.   Getting strong on the bike means you can ride at your goal pace for 180 kilometers, and still have the legs to run a marathon.  The long endurance ride and run off is a staple in ironman training and the one that eat most of your training time.  It is important not to just pedal away just to reach the desired mileage or hours on the saddle.  Train smart by incorporating this workout from ironguides:

Here is one cornerstone long brick workout from our ironman training plans: (weeks 10-14 Learning to Endure Phase). Do this workout if you have built your endurance riding up to 4 hours of riding.

BIKE

Long Bike, building to include hard effort:

  • Start easy, build to moderate and continue to build the effort so that the final hour is HARD.
  • Finish stronger than you start!!!
  • Optionally, you can add distance to the easy and moderate portions of the ride.
  • 270-360 minutes with final 60 minutes Hard

Execution Notes: Use each and every one of these sessions to rehearse your Ironman Race. Practice using the same fuel and drink, equipment (other than race wheels) and eating and drinking schedule.

RUN

Run off the Bike:

  • 40min as: 30min of (30sec Fast / 30sec Easy) 10min easy c/d

Execution Notes: Starting to mix in “pure” race simulation with a race effort run after the longer bike.  Focus on keeping your stride rate high over 96 (step per leg) and really work the fast efforts. Use the easy recovery to prepare for the next fast effort.

Prior to this phase, heavy gear pedaling on the bike and high-cadence running are often prescribed in the weekday workouts.   Heavy gear pedaling (around 70 cadence at heavy gear) recruits more muscle fibers and when done consistently, will make you stronger leading to your long endurance rides.  Running at high stride rates meanwhile will recruit the motor skills required to improve your run efficiency.

On raceday, if you followed your steady goal pace at the bike, it is normal to feel tightness and wobbly legs when starting the marathon run.  Keep in mind the high-cadence training runs and just start with shorter strides and you will feel your legs open up.   Resist the temptation to race others and stick to your goal pace, especially early on the run.

While there are numerous factors that would play on your ironman marathon time, this workout gives you a good foundation to accomplish a better ironman marathon performance.

Want a complete ironguides ironman training plan?   Click here>>http://www.ironguides.net/plan-ironman/

Image Post

Ironman Hawaii – Course review

Ironman Hawaii – Course review

It’s that time of the year! ironguides head coach Vinnie Santana shares great training and racing tips for the Ironman World Championships in Kailua-Kona.  

With Ironman Hawaii just around the corner, athletes are now onto their final and specific training block leading into the race. This article is an overview of the training strategy and key workouts we use to coach our athletes taking part in the race.
SWIM
The conditions in Hawaii are known for being tough. Kona finish times are slower than most other races on the Ironman circuit—this is a result of the three disciplines and not only the hot weather, winds or humidity of the island.

We have discussed before that the swim is often an underrated component of ironman training and racing since, when it comes down to numbers, there gains to be made in the water are small. However, let’s not forget that triathlon is swimbikerun and NOT swim+bike+run—how much you train and how you race will have an impact on the back end of your run split.

The swim leg in Hawaii is usually 3 to 4 minutes slower than most qualifying races, mostly due to the fact that Hawaii is a non-wetsuit swim. This makes training a bit trickier because when we are coaching our athletes to wetsuit swims, we get them to use the pull gear (pull buoy and paddles) for most, sometimes all, of their swim workouts. The pull buoy helps with flotation while the handle paddles keep the heart rate low while building specific arm strength.

From all our athletes who qualified, only two did so in non-wetsuit swims. All the others had their training plans designed tailored to those qualifiers where they were allowed to swim in their wetsuit. So once the Kona slot was secured, we had to do some specific work in the water, as there is a significant difference between the strengthand technique needed for a non-wetsuit swim such as in Hawaii.
The main reason is that the pull buoy (or the wetsuit) helps with balance, which means the athlete stays on the top of the water without too much work. So to counter the excessive use of the pull buoy, we designed a workout with the goal of improving strength and balance. This was needed because when training with the pull buoy, most athletes tend to look up but their position in the water is still high and there is little need for a kick. But once you have no pull buoy or wetsuit, and you are still looking up or ahead, the legs will likely sink, creating extra drag and slowing you down.

Another tool we use in training for non-wetsuit swim races is the ankle rubber band; these tie the ankles together and create extra drag while preventing any kicking. This will force the athlete to rely on balance to get their legs high again—this happens once you push your chest and head down deep in the water.  The athlete then gets used to this position so that when he is swimming without ankle band the position will be the same—very high in the water which is the ultimate goal of the process. A word of caution about using the ankle band—athletes without a swimming background or decent balance in the water won’t be able to swim with good technique, especially for long distances, so they should keep the repeats short, i.e. 25 to 50m.

Here is a standard set we use with our athletes:

** Choice warm up
** Main set (2km):
20x25m moderate with ankle bands – 15sec rest
20x50m as 3×50 easy, 1×50 fast – 15sec rest
20x25m moderate with ankle bands – 15sec rest
**Focus on:
•    Head deep down in the water
•    Water running through the back of your neck
•    Imagine you are swimming “downhill”
•    Push your chest into the water to bring your legs up

The above tips can also be applied if you are training for any other non-wetsuit triathlons.  And the more experienced you are, the longer you can make your repeats and you may also add paddles. Some athletes even like to do fast strides with ankle bands before races—once the race starts, they feel good, confident and “on the top of the water”.

BIKE
The first kilometres are still within Kailua-Kona and are a little technical and generally slow with some turns, climbs and descents. Another very important detail to keep in mind in this early stage of the bike is that the heart rate is very high since the capillaries in the arms are open, while those in the legs are closed, so the heart is forced to work hard to pump to legs. Start VERY EASY in those first 15 to 20 minutes to let the capillaries in your arms shut down and those in the legs open up. Also, don’t eat and drink until after those first 15-20min to avoid diverting blood to your stomach earlier.

05102011-_DSC4966

Once out on the Queen Q it is time to execute your pacing and nutrition strategy. Most athletes are only racing themselves so ignore what other people are doing around you and focus on your own race. It is too easy to get into the hype of racing in Hawaii—relax and follow your plan.

The bike course consists mostly of rolling hills, nothing too steep or too long. Some athletes prefer to ride out of the saddle for the first half of the race since at that stage there is usually a tailwind. Riding in that position gives you great power while also stretching your back and giving your time-trial muscles a bit of a break.

The only serious climb of the course is located heading to the U-turn in Havi. It is relatively long, although not steep. At this stage you also may want to ingest some calories, since the special needs is just after the U-turn, before a fast downhill with crosswinds, so there will be little opportunity to take your hands off the bars for a while. Some athletes have also reported that the bike aid station is unreliable, so make sure you don’t rely on it for your nutrition strategy.

Once headed back to Transition 2, you will likely face a strong headwind, so make sure you are mentally and physically prepared for that otherwise those last kilometres can be a struggle.
Below some specific sessions for the bike course or races with similar profiles:

Session 1) Long ride, preferably over rolling hills with climb sets

**Do 2 climbs of 20-30min long, at hard effort and half way point of your ride as:
•    1st at race cadence
•    2nd using a bigger gear and lower cadence
**   Last hour should be done at moderate to hard effort pushing a lower cadence (~50rpm)

Session 2) Long ride at flat course (if no access to hills)

**Halfway into the ride, do set as below to simulate heart rate and cadence changes of the bike course:
•    i.e.: 1 hour as (5min moderate/5min hard/5min easy)
**  Then Time trial set on last hour:
•    i.e.: 3x(10-15min ON/ 5min recovery)

RUN
The first quarter of the run goes around Ali’i Drive where there are supporters all the time who will cheer for every athlete that runs past. This can actually be dangerous because when you add the adrenalin on the top of the cheering, it is very easy to run faster than the pace you were supposed to run at.

Once out of town, athletes are faced with the Palani road climb, the steepest and longest climb on the run, and again, supporters go mad having fun watching the athletes push their way through the hill. Again, stay focused and stick to the original plan; otherwise it may take a bit too long to recover from that effort.

Then at Queen Q road, it is rolling hills for most of the time, and this is important when it comes to specific training sessions, since it is important to learn how to push on the hills and then recover quickly from that. The workouts below were designed for that part of the race

Another key part of the race is the famous Energy Lab which carries a reputation for being the hardest part of the run course. However, as we know, marketing people like to make things appear different than they are—there is a slight downhill once you enter the Energy Lab all the way to the special needs. There are aid stations, too. As for the conditions, it is usually windy.

Because the aid stations on the run course are very well organized and not too far from each other, most people opt for not carrying any gels and rely on what’s provided on the course for their calories. I would recommend taking your own, since you never know how your stomach will react to new flavors or types of nutrition under stressful circumstances and tough conditions like those in Hawaii.

Out of the Energy Lab and back onto the Queen Q,  again over the rolling hills when you reach Palani downhill, famous as the attack point of Macca on Raelert for the Ironman win in 2010. Don’t get too excited heading down the hill, especially as you may be able to hear the buzz of the finish line area, because you will be directed to a left turn and will still have about a mile to go until the finish line.

Enjoy the last 400m again at Ali’i Drive as your race is over and, mission accomplished, you are an ironman!

Ironman Hawaii Run Sets

Session 1) Long Run
Include:
1 hour easy to moderate pushing up the hills then holding a moderate effort at the top of the hill (increase the stride rate)
1h moderate pushing on the downhills (fast stride with no extra aerobic load)

Session’s goal:
1st hour: Learn how to relax and recover from running up a hill while still running at your race pace. It’s important to push both the hill and the flat section that follows. Use the downhills to rest.

2nd hour: Leg-speed drill—learn how to run with a fast stride rate on fatigued legs. Keep the effort easy to moderate on flats and uphill but push down the hills. This is great to train your strength, coordination, and muscle fibre recruitment.

Session 2) Hill Repeats
Similar to session 1, however much shorter, learn to recover after pushing up the hills (Palani Road, Energy Lab, Queen Q, etc).
**Find a hill that is roughly 2min long with a flat section of another 2min. Push up the hill, hold a moderate effort on the flat, make a U-turn, run back holding that effort, then jog easy down the hill to recover, i.e.:
[2min uphill – hard
4min flat – moderate
2min downhill – easy recovery]
x8

Enjoy your training!

Vinnie Santana


ironguides is the leading Lifestyle Facilitation company for athletes of all abilities. We provide coaching and training services, plans and programs, as well training education, health and fitness products to help you learn and live a healthy lifestyle. Come get fit with one of our monthly training subscriptions, event-specific training plans, coaching services, or a triathlon training camp in an exotic location! ironguides also provides Corporate Health services including Corporate Triathlons, Healthy Living retreats and speaking engagements. At ironguides, your best is our business!

Train with ironguides!

Personalized Online Coaching:  Starting at USD190/month

Monthly Training plans (for all levels, or focused on one discipline): Only USD39/months

Event based training plans:

Sprint Distance (USD45 for 8-week plan)

Olympic Distance (USD65 for 12 week plan)

Half Ironman (R$95 for 16-week plan)

Ironman (USD145 for 20-week plan)

X-Terra (USD65 for 12-week plan)

Running Plans (10k, 21k and 42k – starting at USD40)


Image Post

Triathlon on a Low-Carb High-Fat Diet (ketogenic)

By Vinnie Santana, ironguides.net

Vinnie SantanaNutrition has always had a special place for us at ironguides; it’s a way to improve our athletes’ performance and health. In addition to our training approach, The Method—which is based on hormonal balance—all our coaches had always understood that a diet low on carbohydrates, especially when well timed, is the ticket to improving both performance and health with our athletes.

However, we took this approach to another level when I personally was forced to train, live and race under a LCHF (Low-Carb High-Fat) Ketogenic diet for health reasons. The article below is an introduction to my personal experience on this topic, triathlon training on a “keto” diet.

Background

Back in 2000, I was diagnosed with Diabetes Type 1 at the age of 15. People around me wanted to make me feel better and said, “You can still do whatever you want.” With that motto in mind, I continued on my journey to becoming a professional triathlete.

I was managing diabetes as well as I could back then but, due to the lack of adequate information, my diet consisted of the recommended one for high-performance athletes and I tried to cover all that carbohydrate intake with insulin. That did not work so well and my blood glucose levels were running chronically high.

Despite all the challenges, I still managed to turn pro after winning my first Ironman race in 2004. It came full circle when in 2007 I had a PB of 8h50 at Ironman Brazil, which qualified me—as the youngest professional triathlete—for the Ironman World Championships in Kona. My PB also still stands as the fastest time by a Type-1 Diabetic over the Ironman distance.

Then at the end of 2012 I came across a book named “Diabetes Solution” by Dr. Bernstein and he recommended a diet with no more than 30g of carbohydrate per day. The impact on my health was amazing; after only a couple weeks I was seeing blood glucose levels that until that point had been a distant dream. This result created hope that I was now given a second chance with my health and I could carry on with all my other goals in life, as I felt diabetes wouldn’t be a threat anymore.

Vinnie 1 year A1C

A1C tracks average blood glucose for previous 2-3 months

While I felt great overall, my new diet killed any physical performance I still had—even going up the steps of the local subway station became a challenge. While I didn’t have major plans of racing again, I still exercised on a daily basis and enjoy pushing the intensity here and there, but on that diet, forget it—there were several times I had to walk home from a run, even a slow run.

My work also requires that I train some of my clients in a one-on-one situation. On several occasions I almost got to the point of telling them I couldn’t keep up—and these were beginner athletes, we were running slower than 1-hour 10km pace, a pace I would previously consider slower than a warm-up jog.

To me the message was clear: I had regained my health, but lost my sport. It was a trade-off I could live with but preferred to change. So I kept researching until I finally discovered the world of endurance training on a Ketogenic diet—low in carbohydrates and protein, but high in fat. There was hope again I could continue with triathlon training lifestyle I love.

While there are some resources out there, none of them offered information about a higher-performance racing approach and high intensity training. In theory, Ketosis allows your body to tap into this endless resource of energy stored in your body, named FAT. But it was not clear how well you could perform, at a high level, within this approach.

While I got adapted well enough to get back into doing some exercise, I started to wonder if the athletes I coach could benefit from this diet. So I began to do some experiments in my own racing and training, since my diabetes was now very stable and as an athlete I—unlike my athletes—no longer have pressure to deliver results.

I decided to become my own guinea pig to test what was possible in terms of sports performance on a Ketogenic diet.

While we don’t believe in the magical solution, preferring consistent hard work as the winning formula, a small improvement in performance could make a big difference to some of the athletes we coach—from a more high-performance athlete who is winning smaller ironman races but is not as close to being a threat at the world championships, to the very beginner, but busy, athlete that wants to break a certain time at the next 10km race but has maxed out on his training load.

The theory

There are several books and reputable blogs out there that will cover the benefits of a low carbohydrate diet. I will try to keep this article to the unique information that I can provide based on my experience. But just as a quick intro to sports performance: in theory, being “fat adapted” will provide you the opportunity to use fat as your primary energy source while training and racing, which means that even the leanest athlete still carries dozens of thousands of calories from stored fat and would be able to access to it.

I’ve seen the following analogy that makes things easy to visualize:

  • Non-Fat-Adapted Athlete (on a high-carb diet): Is a Petrol Truck that runs out of fuel and has to stop by the side of the road, since he can’t have access to the huge tank of fuel he is carrying. That would be a non-fat-adapted athlete bonking during an endurance event.
  • Fat-Adapted Athlete (on a LCHF diet): You develop access to the big petrol container that you carry. The same Petrol Truck won’t run out of fuel since you can now access a close-to-unlimited amount of fuel. Or in the athletic world, you won’t bonk anymore in your next endurance events.

On race day your muscle glycogen will also be used better and reserved only for very glycolytic parts of the race.

There are other benefits too in health—especially addressing the metabolic syndrome issues such as lower blood pressure, improved blood fat levels, weight loss. The other very positive benefits of a Ketogenic diet aren’t necessarily to sports performance: brain function and energy levels. Once both body and mind start to work on a consistent flow of energy, there are no dips. My productivity at work, for example, has improved drastically, but we will save this topic for another article and stick to sports performance for now.

Getting adapted

The term “low carb” comprises a relatively flexible range: less than 150 grams per day is technically low carb, but I went straight into what is considered the lowest, a VLC (very low carb) or Ketogenic, diet, and aimed to keep my carb intake below 30g per day as per the book’s recommendation.

As mentioned, the blood glucose results were nothing short of a miracle and that was the single reason why I didn’t quit this way of eating. While working and other daily activities were fine, exercise was a nightmare: I was feeling horrible for everything from easy jogs to higher intensity workouts, but reading that it would take between two and six weeks to adapt, I stuck with it. In fact, I HAD to stick with it FOR LIFE, so there was nothing to lose. I would just stay on the plan, hoping to feel a bit better in a few weeks down the road.

Six weeks into it, I definitely started to feel better, there were still some off-days on which I would feel completely empty in training, when slowing down wasn’t enough and I had to stop the workout completely. But after about three months, those days wouldn’t appear as often. While there was a slower session here and there, I got back onto a “training plan” and started to do several time trials to track progress in which I tried to keep variables for conditions very stable:

  • 5km run on the treadmill
  • 400m swim at a 50m pool
  • 20km bike in the velodrome
velodrome in bangkok

Keep variables consistent while doing tests. Velodrome, treadmill and pool are great facilities for that.

With the above scenario I had the opportunity to track the benefits of several aspects that are supposed to help on a LCHF diet, such as adding electrolytes to the diet to increase blood plasma, Generation UCAN superstarch that releases a very slow carbohydrate into your system, and other general experiments with carbohydrate intake, such as what’s the difference in performance when eating 20g of carbs per day versus 60g of carbs per day.

Fuelling in Training

The whole theory is that you don’t need to fuel in training. However, on the very long sessions fuelling does help to protect muscle mass, keep hunger away after training to avoid overeating and being kicked out of Ketosis, since during training and most of the day you won’t feel very hungry anyway.

At first is difficult to find the appropriate fuel to take in training. I remember I used to make a shake of avocado, coconut milk, nuts, coconut oil, and take it on a bike ride in one of my bottles—right there I had more than 500kcal with very few carbs and would keep the flat flowing through my system.

As you get more experienced and just want to keep things simple, you end up finding your own favourite fuels. These days I enjoy the convenience of UCAN superstarch, packets of nuts, and individually wrapped cheese. I must admit that recipes aren’t my thing, I tend to eat similar things every day and I may need to outsource a recipe book for the LCHF diet. Once you understand the core concept, be creative.

Changes in Body Composition

Staying lean is a challenge for carb-intolerant athletes. Vinnie (white hat) training with Olympic Champion Nicola Spirig at teamTBB.

Staying lean is a challenge for carb-intolerant athletes. Vinnie (white hat) training with Olympic Champion Nicola Spirig at teamTBB.

A nice benefit of a low carb diet, both as an athlete and as an active individual, is the convenience of losing body fat relatively easy.

My whole family is carb intolerant, my father is obese, my mother is borderline pre-diabetic and I have a 2-year-old nephew who has Type 1 diabetes—carbohydrates aren’t our family’s best friend and as an athlete I’ve always struggled to maintain my race weight. I would always train relatively heavy and diet very hard (calorie restriction) in the build-up to my races to lose weight and increase my power-to-weight ratio.


Vinnie on a Ketogenic diet – easier to maintain low body-fat percentage.

Vinnie on a Ketogenic diet – easier to maintain low body-fat percentage.

While on Ketosis my weight has been oscillating a lot less, and it has been slowly changing to a leaner and healthier looking body type.

Special attention to high performance training

This part of this article may not apply to 98 percent of the readers; however, there may be two downsides of a LCHF diet for high-performance training that I’m still working on to improve.

  • Lack of Glycogen for high intensity training

If you are an elite athlete, a 10km runner for example, you will need to run faster than your race pace at several moments during your race. This is a very glycogen-oriented activity and being on Ketosis may make this type of work relatively difficult.

There are two solutions for this problem: 1. fast running on the treadmill because that biomechanically teaches you how to run faster without the extra aerobic load, and 2. sprint runs on a downhill because that has a similar stimulus.

The same challenge also applies to the swim and bike, for which there are also training methods and tools that can be used to mitigate the downsides.

  • Train Low VS Race Higher

Even though your training performance will be very good once you are adjusted, if you go to a high intensity, you will still have the perception fatigue is coming faster and stronger compared with when you are on a high carbohydrate diet. Training tired is hard enough, training tired and low on glycogen can be mentally very draining; it takes a lot of confidence in this approach to know that once race day comes you will be feeling way stronger.

By pulling back your training load (rather than by carboloading), you will get more rest, your muscles will feel fresh and remember that your body is in carbohydrate starvation mode; it will spare every possible gram of glycogen into your muscles, even while you maintain a low-carb diet leading into the race. The result is that on race day you will have a much higher energy level and speed than you are used to in training.

My experience, for example: I could barely break 5:40 on my 400m time trials, then on race day I managed a 5:08—both were done in a pool, that’s a considerable difference!

Racing

There is no substitute for testing your training, equipment, strategy or anything else, than doing the real thing—a real race. After being away from the start line for two years, I decided to put the whole theory to the test and entered several local races.

All were sprint distance that would take me about one hour, mostly in similar conditions in terms of course elevation and weather. So I now had now the opportunity to test the famous carbo-loading theory! In fact there is a little race here in Bangkok that is almost like doing a triathlon inside a gym since it happens in a pool, but you still get the adrenalin boost and the challenge of competition. Below are the things I’ve tested while doing these events:

  • Carbohydrate Loading both the day before and race morning
  • Protein Loading (to achieve gluconeogenesis, i.e. the body’s generation of glucose from non-carb sources)
  • Electrolytes Loading

I wanted to find out how a fat-adapted body could perform on fat only, Ketosis, but with ‘some’ muscle glycogen via protein intake; I also did a relatively high carbo-load (200g on the day before the race). It was also interesting to see the result all those tests had on my diabetes control and blood glucose. Of course I was limited to some of the carbo-load protocol, for example 10g of carbohydrate per kg of body weight, but I’m testing some of these on athletes I coach.

While most of these tests are already done, the more I study and try things, the closer I get to bring out the ideal racing protocol to people on a LCHF. I’m also testing all this on a few of my athletes who are getting ready for Ironman triathlons and marathons. I am aiming to provide an update on the results in about a year.

For now I can say that the difference is very, very small between most of the above scenarios and one can perform very, very fast racing on a Ketogenic diet. I have broken 1 hour in the sprint distance triathlons on Ketosis—while this isn’t a world class time, it’s faster than most triathletes out there.

So, who is this for? Is this for all athletes of all levels?

Everyone can benefit somehow. Some athletes will benefit a lot more, while others need to be very careful with the way they apply the LCHF in their training, otherwise they may be worse off.

This is NOT the magical ticket to success. I remember researching this topic—the message sold was that this was the real deal, rocket fuel that would provide unlimited amount of energy and that I would be able to cruise at my race pace very efficiently without eating any carbs.

You come across testimonials of athletes improving 20 to 40 minutes on their half marathon times and more than an hour on their marathon times. The problem was that this only happened with athletes who were overweight (in relative terms); after losing weight with the LCHF, they went faster mostly due to being lighter, NOT only due to being able to burn fat more efficiently.

So who and how should each specific group use the LCHF? The answer depends on the combination of the length of your event, your performance level and body fat percentage. Below a quick summary of the benefits for each group:

Recreational Athletes – Unless you are very young or part of the lucky ones who won the carb-tolerant DNA ticket, a low-carb approach would bring several benefits, starting at a rapid weight loss, to increasing the ability to burn fat as your primary fuel while training and racing. Since you are also a recreational athlete, your health and wellbeing may also be very high on the priority list; both are two other big reasons to go low carb.

High Performance Age Groupers ­– It depends on the distance you are training for and competing at, but you certainly want to go to a low carb diet and may time your carbohydrate consumption too during, and straight after, your training. If you are a long-distance athlete, spending a lot of time in Ketosis will definitely bring you benefits on your race day.

Professional Athletes – Can definitely benefit from training periods in a lower carb range, but this should also be timed with the type of work they are doing in each period of the week. The biggest difference to the amateur athlete is the very high intensity training and importance of that on race day, especially from a strategic point of view. At that level, athletes aren’t racing against themselves or against the clock, they are racing their competition. There are times they may be forced to dig deep into their glycogen stores to match attacks and stick to the front group. A fast swim start, for example, can cost an athlete the whole race if they miss the pack, or if an athlete is training low on carbs year around, they may find it more difficult to achieve certain speeds and biomechanical efficiencies that come with it.

Post Lunch in Cape Town with Professor Tim Noakes & Wife Marylin Noakes - Tim is the author of Lore of running and most recent has shifted his focus to Low Carb nutrition and published Real Food Revolution - we discussed at lunch the benefits of LCHF for athletes of all levels, beginners is a clearn benefit, while advanced, they can also metabolize fat at a higher rate even while racing after a certain carboload period

Post Lunch in Cape Town with Professor Tim Noakes & Wife Marylin Noakes – Tim is the author of Lore of running and most recent has shifted his focus to Low Carb nutrition and published Real Food Revolution – we discussed at lunch the benefits of LCHF for athletes of all levels, beginners is a clearn benefit, while advanced, they can also metabolize fat at a higher rate even while racing after a certain carboload period

Special Groups – These are usually health related. Diabetics including me are part of this group. Also, if you have any of the conditions listed as metabolic syndrome, you will have huge health benefits (and subsequent performance benefits) of going to a lower carb range.

Conclusion

Do you fit in any of the above categories? Do you think the LCHF approach is for you? Before you make the switch, I suggest you study the topic a bit more and also understand the other health benefits that come with it. In the end this is a change that can improve your performance, health and wellbeing.

Vinnie Santana, ironguides Head Coach

Disclaimer: This article is for information only and should not be used for the diagnosis or treatment of medical conditions. Information on www.ironguides.net is not intended as a substitute for the advice provided by your physician or other healthcare professional.

Train with ironguides!

Personalized Online Coaching: Starting at USD190/month

Monthly Training plans (for all levels, or focused on one discipline): Only USD39/months

Event based training plans:

Sprint Distance (USD45 for 8-week plan)

Olympic Distance (USD65 for 12 week plan)

Half Ironman (R$95 for 16-week plan)

Ironman (USD145 for 20-week plan)

X-Terra (USD65 for 12-week plan)

Running Plans (10k, 21k and 42k – starting at USD40)

Image Post

Training & Ironman performance – The final 6 weeks

By Alun Woodward, coach, ironguides.net

With the Hawaii Ironman World championships now on the radar its a fitting time to look at the final 6 weeks of an ironman program leading into race day. This is very stressful time for athletes as it is the most important in terms of endurance preparation but it is also a time many destroy their chances of a good race by overdoing the training.

Entering the final 6 weeks you should be pretty much race fit and just needing some final touches leading into race day. The big issue here is confidence in your training as its human nature to always want more and that comes with training, we will always tell ourselves no matter how fit and fast that a little more or a little harder training and we can be even faster. Its this mentality that leads to the overtraining issues and bad races we see all to often come race day, we hear time and time again that it was a bad day or bad nutrition but when it comes down to it the main issue for a bad race is overdoing the training and pushing too hard on those final weeks and being empty come race day.

For a successful ironman performance we need short course speed and strength coupled with all day endurance – a tough combination of factors to fit into your training. The speed and strength elements are something that are built up very slowly over time, with the method we look to build this area of fitness consistently through the year using a brick by brick approach – nothing is too damaging so the build is nice and consistent. We need to think about this development like slowly hammering a nail into a wall – little sure taps and the nail will go in straight and sure – try to do it with one big hit and things will most likely go wrong.

05102011-_DSC4962

So we often have athletes ask how long an ironman program needs to be – the truth is the endurance element may need to be 12-16 weeks long but the longer we have to constantly work on strength and speed prior to this the more success the program will be. We see time and time again that 2-3 years of consistent work brings athletes close to their athletic ceiling.

So assuming all has gone well and you have put in an extended period of consistent training you should be entering the final 6 weeks fit and ready for the final touches. As i mentioned above endurance is key in this phase but we do need to maintain speed and strength gains – they key here is maintain not build – we can maintain for 6 weeks with very little work and its more a question of staying on a level that pushing through to the next.

For most working athletes i like to maintain the Monday to Friday program as this is where the speed and strength tend to be focussed due to time restraints – the sessions will become more race specific with longer intervals but all speed and power numbers will be maintained. The weekends are the time when we will look to increase the endurance element of the training with increased swim, bike and run volume.

The final 6 weeks are about specificity and that comes in more than one way, not only does the training need to be race specific but so too does the nutrition. Our bodies are very adaptable but they do take time to adapt and now is the time to make sure the body adapts to the nutrition you are planning to use on race day. Being an ironman event and most likely overseas you need to see what nutrition is available on the course and try to use this in your training so your not exposed to new products come race day.

Endurance blocks, rather than going crazy on some sessions i like my athletes to include 2 focussed and planned 4 day endurance blocks within the final 6 weeks, ideally without work so not only can training be maximised but recovery too – these 4 days will see roughly a weeks training volume but focussed on swim and bike rather than run to allow overload without too much damage and allow the athletes to jump straight back into regular training. 4 days works very well for this, there is no need to push for more than this as the body will start to massively break down and require extended reverie time which will impact fitness.

Nutrition is an area that needs to focussed on also during the final 6 weeks, we all get so set in our ways with food and tend to cycle the same meals and same portion size week by week. As we hit the final 6 weeks and training volume increases so too does the calorific need of the body, in the final 6 weeks make sure you reflect this by increasing portion sizes where appropriate and than especially means more carbs during endurance sessions and immediately following big sessions. This can be a big challenge for many as the mentality is always to drop weight in the final weeks as again we all falsely believe lighter is faster on race day and always looking to lose the last few kg during this period. If you train more and eat less bad things are going to happen!! If your looking to reach race weight it should be done by 6 weeks out and then its about maintaining and focussing on feeling the work and recovery.

Not only does training hard mean eating hard it also means recovering hard, make sure this is a time where you ignore those social events and jobs to be done around the house. Its only 6 weeks and making sure you spend a little more time focussed on recovery will lead to more gains from the work you put into training!

Finally the last thing i like to remind my athletes is i want them feeling like caged animals come race day, race day is the time to release all the hard work done and really reap the rewards for al your hard work. How many times do we see athletes dreading a race as they feel broken down, tired and not ready to race – it all comes from pushing for that last minute fitness and not resting – in those final 6 weeks you have to do the work but every time you feel great and motivated and like pushing the boundaries remember the caged animal – remember the feeling and keep it under wraps until race day – pushing on now will not make you faster more than likely you will leave your perfect race on the training fields.

Enjoy your training

Alun Woodward

Alun Woodward

– 

Train with ironguides!

Download our free e-Book “Triathlon Secrets” – Training methods of olympic medalist, ironman and world champions revealed

Personalized Online Coaching:  Starting at USD190/month

Monthly Training plans (for all levels, or focused on one discipline): Only USD39/months

Event based training plans:

Sprint Distance (USD45 for 8-week plan)

Olympic Distance (USD65 for 12 week plan)

Half Ironman (R$95 for 16-week plan)

Ironman (USD145 for 20-week plan)

X-Terra (USD65 for 12-week plan)

Running Plans (10k, 21k and 42k – starting at USD40)

Image Post

Video: 3 steps to a faster swim

Swimming is often the most difficult discipline to improve especially for beginner triathletes. While cycling faster is a result of cycling lots, doing it intensity and pushing heavy gears and running improvement is highly related to how often you run and your body composition (beginners improves their run as they get leaner), swimming requires both specific fitness and technique.

I’ve been coaching a triathlon club for almost ten years and a very common mistake I see people doing is looking ahead / up, as they swim, this only makes their legs sink, creating more drag and slowing them down. The steps below will force you to swim at an appropriate technique, when it comes to head position and how your upper body can impact where your legs will be in the water

Step 1 – Ping Pong ball drill

Place a ping pong ball under your chin and try not to lose it. This will force you to keep looking down. Stop to breath as you need to and do a few 25m repeats like that until it becomes easy to keep the ping pong ball in place

Step 2 – ankle bands

We’ve discussed swimming with ankle bands in other articles before, it creates extra drag and unless you press your chest into the water, kill your glide, and accelerate your stroke turnover, you won’t be going anywhere. Keep the repeats short, 25’s or 50’s

Step 3 – focus on the new technique for the rest of your workout

With the above exercises you should be swimming with a new and improved technique, you may then continue your main set but make sure you be aware of both your head position and keep on pressing your chest towards the bottom of the pool.

Lets go to the video:

By Vinnie Santana, online Coach, ironguides.net
– vinnie2

Train with ironguides!

Personalized Online Coaching:  Starting at USD190/month

Monthly Training plans (for all levels, or focused on one discipline): Only USD39/months

Event based training plans:

Sprint Distance (USD45 for 8-week plan)

Olympic Distance (USD65 for 12 week plan)

Half Ironman (R$95 for 16-week plan)

Ironman (USD145 for 20-week plan)

X-Terra (USD65 for 12-week plan)

Running Plans (10k, 21k and 42k – starting at USD40)

X

Forgot Password?

Join Us